Saturday, October 24, 2009

Edited portraits!


1 and 2. Beautiful Cindy: 10-24-09, 4:00 pm; Rexburg, Idaho; f/2.8, 1/30s; FujiFilm finepix S1000
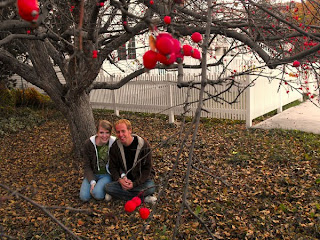
3 and 4. Under a Tree: 10-24-09, 5:05 pm; Rexburg, Idaho; f/2.8, 1/70s; FujiFilm finepix S1000
5. One more of Cid and Casey: 10-24-09, 4:25 pm; Rexburg, Idaho; f/40, 1/125s; FujiFilm finepix S1000;


These edits were a lot of fun. On the first two pictures of Cindy on her laptop, I changed a few things. I changed the color of her shirt with a clipping mask. And I also touched up her teeth, eyes, and two little spots on her face.
Next I was really impressed with how much of a difference mixing the colors from another photo improved my original photo of Cid and Casey under the tree. This was really easy to do, but I think it went a long way.

Portraits!


1. Post Card: 10-24-09, 4:15 pm; Rexburg, Idaho; f/4.0, 1/75s; FujiFilm finepix S1000
2. Laying Down: 10-24-09, 2:20 pm; My apt, Rexburg, Idaho; f/4.0, 1/60s; FujiFilm finepix S1000;
3. Sideways couple: 10-24-09, 4:40 pm; Rexburg, Idaho; f/4.0, 1/70s; FujiFilm finepix S1000;

1. This is my favorite. For this picture I sharpened it and then put a burned edge around it. Also, I this time I was in the lab and the tutor showed me how to do the actions and I used actions for editing all of my pictures. Actions in Photoshop make things so much easier and there are some really cool actions!
2. I took this picture after reading the first liked website on the Ilearn page and it had ten tips to take better portraits. It had some great ideas and I tried to do them and I thought that this picture/ esspecially the lighting, came out amazing. I didn't do any edits to this picture.
3. This is another of my sister and her boyfriend and I actually rotated the image. Then I warmed the colors with an action and put a burned edge on it.

Monday, October 19, 2009

Picture Edits


1. Park Bench: 10-17-09, 11:25 pm; The Gardens on campus, Idaho; f/2.7, 20s; Sony DSC-H7
2. Gardens invite: 10-17-09, 11:15 pm; Rexburg, Idaho; f/4.0, 3s; Sony DSC-H7

These were both taken with a stand.
1. This one was a lot easier than it looks. You put a new white layer over the picture and then add a mask to that layer and change the opacity as you layer squares over the original image.
2. For this one I followed the tutorial in the book. I also adjusted the brightness.

Lights at Night


1. Secret Garden: 10-17-09, 11:10 pm; The Gardens on campus, Idaho; f/2.7, 5s; Sony DSC-H7
2. Pro macbook: 10-17-09, 12:35 pm; Rexburg, Idaho; f/4.0, 5s; Sony DSC-H7
3. Stadium: 10-17-09, 11:45 pm; Rexburg, Idaho; f/7.1, 3s; Sony DSC-H7
4. Night Moto: 10-17-09, 10:40; Rexburg, Idaho; f/2.7, 30s; Sony DSC-H7

All these pictures where taken with a tripod and on setting ISO80
1. This is my favorite. To me it doesn't even look like this picture was taken in the gardens. I adjusted the Hue and Saturation and raised the brightness and contrast just a little.
2. I took this in my room with all the lights off. All I did was sharpen the image.
3. This picture is interesting to me. I can't figure out how the field is in such good focus, yet I was able to streak the lights like I did... It was on a stand and I moved the arm to have the camera look down before the shudder closed. I didn't do any photoshop to this one.
4. This was a sweet bike on campus. I adjusted the balance and also the hue and saturation.

Sunday, October 11, 2009

For some reason it wouldn't let me post more than 5 images on blogspot so I had to split my posts up...


1. Sewing Machine: 10-7-09, 5:15 pm; Bannack, Montana; f/2.7, 1/30s; Sony DSC-H7
2. Ghost Home: 10-7-09, 5:35 pm; Bannack, Montana; f/5.6, 1/320s; Sony DSC-H7
3. Gravestone: 10-7-09, 6:15 pm; Bannack, Montana; f/2.7, 1/50s; Sony DS

1. The sewing machine: for this one I did the photofinishing to sharpen the image, blur the edge, and then I changed the sat and hue a little bit.
2. The House: I also did the photo finishing tutorial on this one as well and in addition I put a dark border around the edge.
3. Tombstone: this was my photo that we took during the few minute competition in the graveyard. I didn't make any changes to it.


More Bannack photos


1. Haunted Hallway: 10-7-09, 2:00 pm; Bannack, Montana; f/8.0, 4"; Sony DSC-H7
2. Family Portrait: 10-7-09, 4:15 am; Bannack, Montana; f/3.2, 1/20s; Sony DSC-H7
3. Double Portrait: 10-7-09, 4:20 am; Bannack, Montana; f/3.2, 1/30s; Sony DSC-H7

1. Ghost Photo: I probably didn't need to do any changes to this photo, but I did the photo finishing technique again from #30 in the book.
2. I didn't need to do much to this picture cause Cindy is just so pretty!
3. A bunch of people were taking pictures of Anica's pretty smile so I thought this was fun to get the back of another camera. I added a little blur to the background and sharped the foreground so you could see the camera's display better.

HDR - Ghost Window


1. Ghost Window - HDR
2. Minus 1 - Ghost Window: 10-7-09, 12:15 am; Bannack, Montana; f/4.0, 1/200s; Sony DSC-H7 - Tripod
3. Zero - Ghost Window: 10-7-09, 12:15 am; Bannack, Montana; f/4.0, 1/100s; Sony DSC-H7 - Tripod
4. Plus 1 - Ghost Window: 10-7-09, 12:15 am; Bannack, Montana; f/4.0, 1/60s; Sony DSC-H7 - Tripod

Is there much to say about these? These were HDR plus and minus 1.

HDR - Hotel Mead


1. Hotel Mead - HDR
2. Minus one - Hotel Mead: 10-7-09, 11:30 am; Bannack, Montana; f/5.6, 1/1250s; Sony DSC-H7
3. Zero - Hotel Mead: 10-7-09, 11:30 am; Bannack, Montana; f/5.6, 1/640s; Sony DSC-H7
4. Plus One - Hotel Mead: 10-7-09, 11:30 am; Bannack, Montana; f/5.6, 1/320s; Sony DSC-H7

These are HDR photos taken with a tripod of course and I slightly added some color and some lighting.

Sunday, October 4, 2009

Photo Finishing


1. Flower in Eden: 10-3-09, 1:40 pm; Idaho Falls Hospital; f/4.0, 1/125s; Sony DSC-H7
2. Picnic Spot: 10-3-09, 2:30 pm; Flower shop in Idaho Falls; f/2.7, 1/40s; Sony DSC-H7

1. On the first image I did the smart filter tutorial #23. I tried a number of different filter, but for some reason using just the plastic filter stuck out to me the most and then I used the brush to have the flower show through without any changes.
2. I really liked this photo even before editing it, but with the edits I like it even more. I followed tutorial #30 to do the photo finishing tips. I also adjusted the levels and the hue and saturation.

Animal and Foliage


1. Hospital Flora: 10-3-09; 1:30 pm; Idaho Falls Hospital; f/4.0, 1/125s; Sony DCS-H7.
2. Flower Patch: 10-3-09, 2:00 pm; Flower Store in Idaho Falls; f/4.0, 1/200s; Sony DCS-H7
3. Aisle of Foliage: 10-3-09, 2:10 pm; Flower Store in Idaho Falls; f/3.5, 1/250s; Sony DCS-H7.
4. Caged dog: 10-3-09, 10:10 am; Saratoga Springs, Utah f/4.0, 1/100s; Sony DCS-H7;


1. This one I didn't make any changed to. I tried to get it from a different couple angles to get a nicer effect and I liked this the most.
2.On this one I only changed the levels.
3. I really liked the lines in this one. I didn't change any settings with the lighting, but the picture was a little crooked at first, so I tilted it and then cropped it.
4. For the dog I had to change the levels and I slightly adjusted that saturation.